Table of Contents
ToggleSkyrim‘s Daedric quests are some of the most intense and rewarding content in The Elder Scrolls V, but few hit as hard as “Ghosts of the Tribunal.” This quest drops players into a confrontation with the vengeful spirits of the Tribunal, mortal gods turned bitter after their fall from grace. It’s not your typical dungeon crawl. The Ghosts of the Tribunal challenge demands preparation, strategy, and a solid understanding of what you’re walking into. Whether you’re a seasoned Skyrim veteran or tackling this quest for the first time, this guide covers everything you need to survive the encounter, claim the rewards, and avoid the pitfalls that catch most players off-guard.
Key Takeaways
- Ghosts of the Tribunal is a challenging modded quest featuring three coordinated Daedric-corrupted spirits that require preparation, strategic builds, and resource management to defeat.
- Vivec’s lightning attacks deal massive damage and demand at least 25-30% shock resistance through gear enchantments, potions, or perks to survive the encounter.
- Recommended builds include melee tank (Daedric Greatsword with heavy armor), destruction mage (Inferno and Chain Lightning spells), or archer kiter (light armor with stamina regeneration) depending on your playstyle.
- Quest completion rewards 5,000-10,000 experience points, faction reputation, exclusive Daedric vendor access, and unique quest items like the Mace of Almalexia and Spear of Vivec.
- Common mistakes to avoid include underestimating enemy scaling at level 35-40, neglecting elemental resistance, relying solely on summons, and exhausting healing potions before the final boss fight.
- Veteran players should exploit terrain geometry for line-of-sight breaks, use follower builds strategically, and employ attrition tactics by kiting endlessly rather than attempting aggressive approaches.
What Are Ghosts Of The Tribunal?
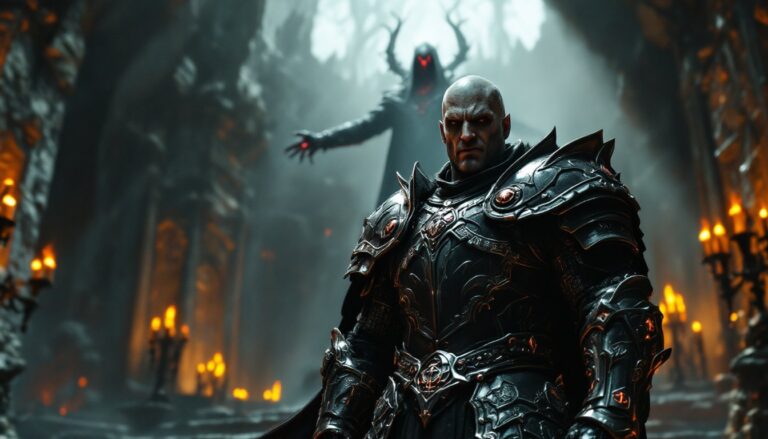
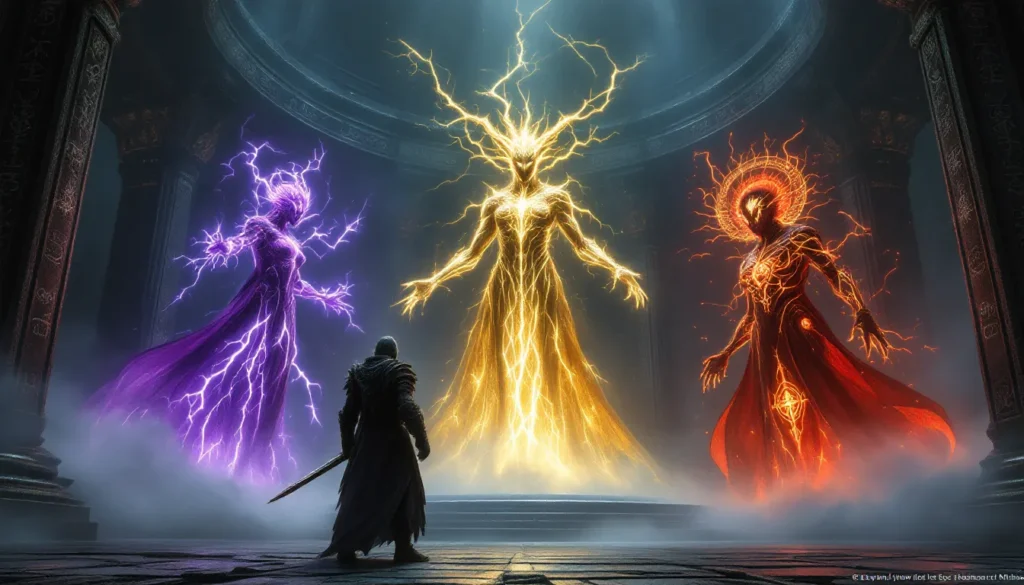
The Ghosts of the Tribunal are manifestations of the three deities from The Elder Scrolls III: Morrowind, Vivec, Almalexia, and Sotha Sil. In the context of Skyrim, these aren’t literal ghosts but rather Daedric-corrupted echoes bound to a specific location. They represent the trio’s rage and desperation following their loss of divinity after the events of Morrowind.
These entities aren’t passive haunts, they’re actively hostile and significantly more dangerous than standard undead encounters. Each ghost retains magical abilities corresponding to their original divine domains: Vivec wields lightning and mobility, Almalexia commands restoration and physical prowess, and Sotha Sil deploys magical attacks and crowd control. They don’t fight independently: they coordinate, which means tanking, kiting, and crowd control become essential. The Ghosts of the Tribunal encounter is designed to punish sloppy tactics and reward methodical, build-aware gameplay.
Quest Overview And Objectives
The Ghosts of the Tribunal quest typically initiates through a shrine interaction or as part of Daedric quest chains linked to the Dremora. The objective is straightforward on paper but brutal in execution: locate the ghosts, enter their domain, and dispatch them. The real layer sits underneath, you’re dealing with entities tied to Daedric influence, meaning standard strategy won’t cut it.
Your primary objective is to eliminate all three Tribunal ghosts without dying. A secondary objective often involves collecting loot or specific items tied to each ghost, depending on which quest variant you’re pursuing. Skyrim’s modding community has created multiple interpretations of this quest (since it doesn’t exist in vanilla Skyrim), so your exact objectives may vary. But, the core remains: prepare adequately, manage resources, and execute a coherent battle plan against three coordinated opponents. The quest rewards depend on completion difficulty, you’re not just getting gear: you’re earning bragging rights and some of the most potent Daedric artifacts in the game if you’re running one of the popular mod versions.
Where To Find Ghosts Of The Tribunal
Mehrunes’ Dagon Temple Location
The Ghosts of the Tribunal typically manifest within Mehrunes’ Dagon Temple or similar Daedric shrines, depending on your mod setup. If you’re running the popular mod version, the location is accessible through the Dremora camps scattered across Skyrim’s northern regions. The most common spawn point is hidden behind a series of Daedric wards and puzzle doors designed to slow unprepared players.
The physical journey to Mehrunes’ Dagon Temple involves navigating through hostile Dremora, trapped corridors, and environmental hazards. Expect resistance, these locations don’t just house ghosts: they’re Daedric strongholds. Bring healing potions, restoration scrolls, and crowd control tools. Many players recommend clearing the external area first, stashing loot, and entering the boss chamber only when fully prepared. The temple itself is a maze-like structure with multiple branching paths, so exploration rewards you with side loot and alchemical ingredients if you’re thorough.
How To Access The Quest
Accessing the Ghosts of the Tribunal quest depends on your Skyrim installation. In vanilla Skyrim, this quest doesn’t exist, it’s purely a mod addition. If you’re running mods, you’ll typically activate the quest through:
- Shrine interaction: Finding a Daedric shrine dedicated to the Tribunal and interacting with it to receive the quest directive.
- Miscellaneous objectives: Picking up the quest through Daedric-themed mods that integrate Tribunal lore into Skyrim.
- Faction questlines: Some mod packs tie the Tribunal ghosts to specific Daedric faction chains.
For console players (PlayStation and Xbox), mod availability varies. PC players have the most robust access through Skyrim Dungeons and platforms like Nexus Mods. Always verify your mod load order before starting the quest, conflicting mods can cause the encounter to break or spawn incorrectly.
Once activated, the quest marker directs you toward the temple. Don’t ignore preparation stages: the game won’t hand you difficulty adjustments if you’re underlevel. The Tribunal ghosts scale somewhat with your character level, but minimum effective level recommendations sit around 35-40 depending on your build and difficulty setting.
Combat Strategy And Tips
Preparing For The Battle
Preparation is non-negotiable for the Ghosts of the Tribunal encounter. This isn’t a fight you can brute-force without consequences. Start by crafting or purchasing heavy-hitter potions: Magicka Restoration, Health, Stamina, and Elemental Resistance. Vivec’s lightning attacks shred players without proper shock resistance: aim for at least 25-30% shock mitigation through gear enchantments, perks, or potions.
Stock up on Dispel potions or carry a character with strong dispel magic. The Tribunal ghosts apply buffs that amplify their damage and defense, removing these debuffs you is critical to reducing their survivability. Bring a ranged weapon as a backup: melee-only builds get punished hard when dealing with three mobile targets. Consider equipping Necklace of the Tribunal or similar Daedric artifacts that grant elemental resistances, these drops from related quests, so if you’ve completed other Daedric chains, you’ll already have them.
Clear your inventory of junk. You’ll need room for loot post-victory, and weight penalties during the fight kill agility. Fast travel to the temple only when you’re fully prepped, there’s no shame in turning back if you realize mid-journey you forgot something critical.
Recommended Builds And Loadouts
Melee Tank Build:
- Main weapon: Daedric Greatsword or Ebony Blade (two-handed)
- Armor: Daedric Plate Armor (crafted or looted) with perks in Heavy Armor
- Shield alternative: Tower Shield for one-hand/shield setup if you prefer defense over damage
- Enchantments: Prioritize health restoration, elemental resistance (especially shock)
- Perks: Invest in Block (Elemental Protection), One-Handed/Two-Handed (Champion’s Stance), Heavy Armor (Juggernaut)
Destruction Mage Build:
- Primary spells: Inferno (fire damage overwhelms magical defense), Chain Lightning (hits multiple targets, synergizes against grouped enemies)
- Secondary spells: Greater Ward, Spell Absorption (defensive layers)
- Gear: Robes with Magicka regeneration enchantments, circlet of Magicka, gloves of Magicka
- Perks: Destruction (Inferno, Ruin, Augmented Flames), Restoration (Necromage if you’re undead race), Alteration (Magic Resistance)
- Backup plan: High-level Restoration spells for emergency heals
Archer Kiter Build:
- Weapon: Daedric Bow with Daedric Arrows or Explosive Arrows
- Gear: Light Armor for mobility, focus on stamina regeneration
- Enchantments: Bow enchantments (fire/frost/shock damage), stamina restoration on hit
- Perks: Archery (Eagle Eye, Steady Aim), Light Armor (Wind Walker)
- Playstyle: Keep distance, avoid clustering with ghosts, abuse terrain for LoS breaks
Mixed builds (e.g., Battlemage with sword + spells) work if you’re comfortable managing both resource pools. The key is adaptability, if one approach fails, swap tactics.
Defeating The Tribunal Ghosts
Enter the chamber expecting all three ghosts to activate simultaneously. Your first 10 seconds determine the entire fight’s flow. Immediately target the ghost closest to you and establish aggro. If you’re running a magic build, begin casting Mayhem or Fury spells to create separation and chaos, the ghosts fighting each other buys you repositioning time.
Phase 1 (Aggro Control):
- Don’t let the ghosts cluster: kiting around arena geometry preserves your health.
- Vivec’s lightning attacks require constant movement, don’t stand still during his casting animations.
- Use Restoration potions preemptively, not reactively. Drink when you hit 60% health, not 20%.
- If running melee, bash or shield slam to interrupt casts from range-attacking ghosts.
Phase 2 (Resource Management):
The Tribunal ghosts have substantial health pools, expect 10-15 minute fights if you’re not optimized. Monitor your magicka/stamina carefully. Don’t blow all resources early: ration your heavy hitters. If using potions, space them strategically, guzzling five health potions in rapid succession is wasteful when spacing them maximizes potion count.
Phase 3 (Cleanup):
Once a ghost drops to 25% health, it often triggers a desperation attack (increased casting speed, heightened physical aggression). Expect this and overcompensate with healing. Finish kills methodically: don’t get greedy and take unnecessary damage on the final blow.
Coordinated teams (if running co-op mods) can designate roles, one player tanks, one applies crowd control, one dishes DPS. Solo players need to manage all three roles, which is exhausting but manageable with proper build optimization.
Rewards And Loot
Quest Completion Benefits
Completing the Ghosts of the Tribunal quest grants substantial quest rewards depending on mod implementation. Most versions reward 5,000-10,000 experience points and reputation increases with Daedric-aligned factions. You also unlock vendor access to exclusive Daedric gear from associated NPCs, which isn’t available through normal gameplay.
The real benefit is psychological, you’ve conquered one of Skyrim’s most punishing encounters. The quest completion unlocks bragging rights in modding communities and sets you up for subsequent Daedric chains. Some mod packs gate higher-tier Daedric content behind this quest, so finishing it opens new quest lines and locations.
Unique Items And Equipment
Each of the three Tribunal ghosts drops unique loot upon defeat. These aren’t generic Daedric gear, they’re quest-exclusive items with properties tied to the original god’s domain:
Vivec’s Drop (Lightning-focused):
- Spear of Vivec (unique polearm with shocking enchantment, scales with Destruction if running mods that support spell scaling)
- Vivec’s Robe (mage armor with Magicka regeneration and shock resistance)
Almalexia’s Drop (Restoration-focused):
- Mace of Almalexia (unique one-handed with healing enchantment, damages enemies, heals wielder)
- Almalexia’s Armor (heavy plate with permanent health regeneration)
Sotha Sil’s Drop (Artifice-focused):
- Keening Dagger (unique dagger with soul trap and magicka drain)
- Sotha Sil’s Robe (expert-level mage gear with Magicka and Magicka regeneration bonuses)
These items are valuable trade goods if you’re not using them, they sell for 3,000-5,000 gold each depending on your Speechcraft skill and NPC merchant disposition. For serious builds, combining gear from all three ghosts creates potent set bonuses through enchantment stacking. A sword-and-board character wearing Almalexia’s Armor while wielding the Mace of Almalexia becomes nearly unkillable through self-healing. Resources like Game Rant and GameSpot often feature build guides that leverage these items effectively if you want inspiration for optimization.
Common Mistakes To Avoid
Underestimating Enemy Scaling:
The Ghosts of the Tribunal scale partially with character level, but many players assume they’re scaled to level 50+ characters. They’re not, they’re closer to level 40-50 encounters regardless of your level. Walking in at level 35 expecting a balanced fight is naive. Always check mod documentation for exact difficulty curves.
Neglecting Elemental Resistance:
Vivec’s lightning attacks one-shot players without shock resistance. This isn’t hyperbole, 25% shock resist means surviving attacks that would otherwise insta-kill. Craft shock resistance potions and equip gear accordingly. It’s the single most common death cause in this encounter.
Relying on Summons Exclusively:
Summoning Daedra to tank the fight sounds tactically sound but fails because Daedric summons aggro the Tribunal ghosts instantly. Your summons die in seconds, wasting Magicka. Use summons as supplementary damage, not primary tanks. They’re force multipliers, not win conditions.
Not Managing Crowd Control:
The Tribunal ghosts will paralyze, stun, or root you if given the chance. Carrying items or spells that grant immunity (paralysis potions, spell absorption enchantments) is essential. Ignoring CC effects means you’ll stand helplessly while enemies whale on you for 5+ seconds per proc.
Exhausting Resources Before the Final Boss:
If you’ve already burned through potions clearing the temple exterior, you’ll enter the final chamber depleted. Budget resources: 70% for the boss fight, 30% for trash. Don’t arrive with half potions consumed.
Incorrect Mod Load Order:
If you’re running multiple Daedric quest mods, load order matters. Conflicting mods cause the Tribunal ghosts to fail spawning or glitch out. Always run a clean test with only the Tribunal mod enabled first, then add mods incrementally to identify conflicts. Tools like LOOT automate this process on PC.
Advanced Tips For Veteran Players
Exploit Terrain Geometry:
The temple contains pillars, ledges, and alcoves. Use these to break line-of-sight with ranged attackers, forcing them to reposition. Vivec relies on lightning chains, interrupting his casting by moving behind cover prevents damage splash to your allies (if playing co-op).
Abuse Destruction Spell Interactions:
If using mods that allow spell tweaking, stack elemental damage types. Fire + Frost creates a unique interaction in some mod setups where simultaneous damage types trigger explosive procs. Verify this works in your mod environment before relying on it mid-fight, though.
Use Follower Builds Strategically:
Vanilla Skyrim followers tank poorly against the Tribunal, but modded followers with Daedric gear perform decently. Equip them with Fortify Health enchantments and have them use Healing spells. A well-geared Erandur or Dremora companion significantly reduces fight duration. Don’t rely on them entirely, they’re still NPCs and die like any other.
Kite Endlessly If Necessary:
There’s no timer. If you need 30 minutes of kiting to chip away health, so be it. The Tribunal ghosts don’t recover health, so attrition eventually wins. Patient, boring gameplay beats aggressive mistakes.
Pre-Buffer Before Entering:
Cast all beneficial spells (buffs, armor spells) before entering the chamber. Use Frenzy potions beforehand to ensure you’re in combat state. This maxes damage output immediately upon aggro. Some players also use Invisibility potions to slip past trash and save resources, entering the boss chamber at full strength is a significant advantage.
Respect Enrage Mechanics:
When ghosts drop below 20% health, they often trigger berserker states. Expect massive DPS spikes and prepare accordingly. Don’t be in melee range when this triggers, back off, heal, and re-engage once their burst phase ends. This applies universally across all three ghosts.
Conclusion
The Ghosts of the Tribunal represent Skyrim modding at its best, a challenging, lore-respecting encounter that rewards preparation and punishes carelessness. This quest isn’t vanilla content, but it’s become canonical for serious players seeking high-level endgame challenges. Whether you’re tackling this as a pure melee fighter, a destruction mage, or an archer kiter, the core principle remains: arrive prepared, manage resources carefully, and execute a coherent strategy.
The rewards justify the effort. Quest-exclusive gear, experience, and faction reputation position you for subsequent Daedric content. More importantly, you’ll have conquered a genuinely difficult encounter in a game that often feels too easy at higher levels. If you haven’t experienced the Ghosts of the Tribunal yet, prioritize this quest on your next modded Skyrim run. Community consensus, across Twinfinite forums, Discord servers, and Reddit, places this among the top three player-created Daedric quests worth experiencing.
Now go claim those artifacts. The Tribunal awaits.