Table of Contents
ToggleThe Bloodskal Blade stands as one of Skyrim’s most distinctive legendary weapons, earned not through vendor purchases or dungeon loot but through a dedicated questline that tests your combat prowess and puzzle-solving skills. This unique greatsword doesn’t just deliver damage, it projects devastating energy slashes that can hit enemies from a distance, a mechanic that fundamentally changes how you approach combat encounters. Whether you’re a completionist hunting every unique weapon or a player looking for a fresh playstyle, understanding how to acquire, optimize, and effectively wield the Bloodskal Blade is essential. This guide breaks down everything you need to know: from the exact location and prerequisites to the specialized builds that make this weapon truly shine.
Key Takeaways
- The Bloodskal Blade is a unique greatsword found in Raven’s Cairn on Solstheim (Dragonborn DLC) that fires damaging energy waves with every attack, effectively doubling its damage output against multiple enemies.
- Acquire the Skyrim Bloodskal Blade by solving two puzzles (rotating pillars and rune placement) and defeating draugr enemies in a linear dungeon—accessible at level 15+ but recommended for level 20+ characters.
- The Bloodskal Blade deals 18 base damage plus ~25 enchantment damage per projectile, with true power coming from two-handed skill perks like Champion’s Stance that scale both melee and ranged damage.
- Optimal Bloodskal Blade builds prioritize heavy armor, two-handed weapons, and stamina regeneration—consider hybrid builds with Restoration or Alteration magic to maximize survivability and tactical flexibility.
- Compared to other legendary weapons like the Ebony Blade or Wuuthrad, the Bloodskal Blade excels in crowd control and versatility through its unique energy wave mechanic rather than pure raw damage.
- Maximize the Bloodskal Blade’s potential by tempering it 2–3 times, stacking complementary enchantments on armor (especially Fortify Stamina Regen and Two-Handed bonuses), and using positioning to hit multiple enemies with projectile waves.
What Is the Bloodskal Blade?
The Bloodskal Blade is a unique greatsword introduced in the Dragonborn DLC that stands apart from standard weapons through its signature ability: it fires projectile energy waves with every attack. When you swing this blade, whether while sprinting, power attacking, or performing normal strikes, it releases crimson energy slashes that travel forward and damage enemies before your sword even makes contact. This mechanic essentially gives the weapon a built-in range component that melee weapons typically lack.
Statistically, the Bloodskal Blade deals 18 base damage with a swing speed slightly slower than standard greatswords. The real value lies in its unique enchantment, which adds approximately 25 additional damage per energy wave. For a weapon acquired through a dedicated questline rather than crafting, this positions it as a solid mid-to-late game option, especially for characters who’ve invested heavily in two-handed weapon perks.
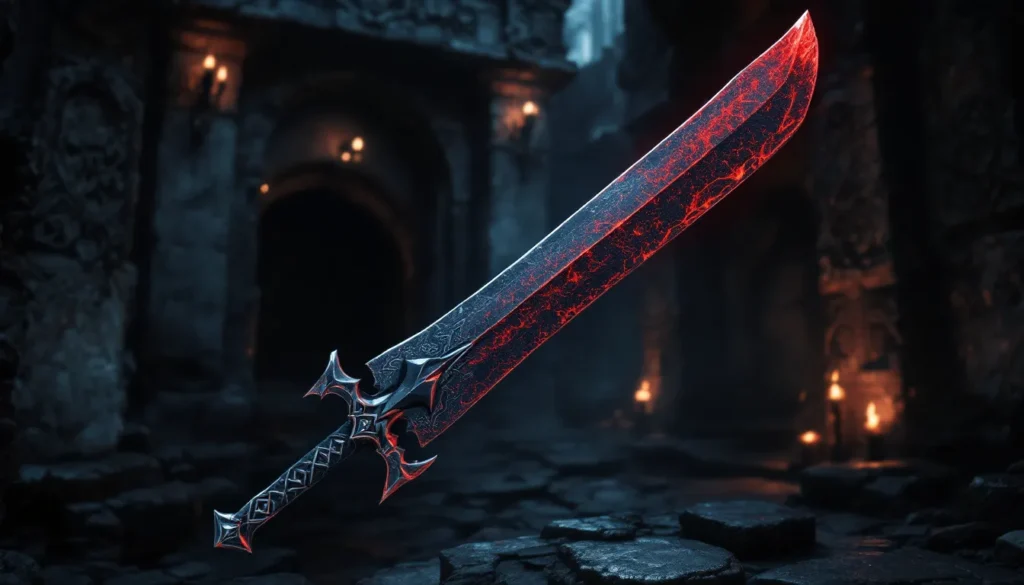
The blade’s appearance matches its dark aesthetic: a crimson-tinged greatsword with an ominous aura. Holding it immediately signals that you’ve completed the Raven’s Cairn questline, giving it a sense of prestige among Skyrim players who recognize its significance.
Where to Find the Bloodskal Blade
Raven’s Cairn Quest Location
The Bloodskal Blade is found exclusively in Raven’s Cairn, a Nordic ruin located on the northeast coast of Solstheim in the Dragonborn DLC. The exact coordinates place it roughly northeast of Raven’s Watchpoint, sitting on a remote cliff overlooking the Sea of Ghosts. This location is completely inaccessible during the base game, you must have the Dragonborn expansion installed to access Solstheim at all.
The dungeon itself spans multiple chambers with a nordic architecture that blends tombs, ancient corridors, and puzzle rooms. The blade sits as a final reward in the main chamber, requiring you to work through the dungeon’s entire gauntlet before claiming it. There’s no shortcut or back entrance: progression is linear from the exterior entrance to the final chamber where the blade rests on a pedestal.
Prerequisites and Quest Requirements
Technically, the Bloodskal Blade doesn’t require any active quest, you can walk into Raven’s Cairn at any point after reaching Solstheim. But, the dungeon is designed around the “Bloodskal Blade” miscellaneous quest, which you’ll receive automatically upon discovering a Bloodskal Blade note that describes how to find it. This note can be found in various locations around Solstheim or you can simply head to the dungeon directly without the formal quest marker.
Major prerequisites include:
- Access to Solstheim (requires Dragonborn DLC)
- Ability to reach the northeast coast of Solstheim (fast travel or overland journey)
- Combat capability to handle draugr enemies (recommended level 20+, though level 15+ can manage with preparation)
- Puzzle-solving skills for the interior chambers
You don’t need any specific quests completed, faction membership, or special items to enter. The dungeon is completely self-contained and doesn’t branch from any main storyline content. This makes it accessible at almost any point in a playthrough, though the combat encounters will be substantially easier at higher levels.
How to Unlock the Bloodskal Blade
Solving the Bloodskal Puzzles
Raven’s Cairn contains two primary puzzle encounters that gate your progression toward the blade. The first involves rotating stone pillars with different symbols, a classic Nordic dungeon mechanic. You’ll encounter a central chamber where four pillars surround a door. Each pillar can be rotated to display different symbols: a snake, a whale, a compass rose, and a warrior.
The solution requires matching the symbols in the correct order. Examine the clues scattered throughout the first chamber: skeletal remains, ancient carvings, and broken weapons provide hints about the intended sequence. The correct order is typically Snake → Whale → Compass Rose → Warrior, though careful observation of the chamber’s elder scroll imagery and weapon placements confirms this sequence. Rotate each pillar accordingly, and the door unseals.
The second puzzle involves rune placement in a bridge chamber. You’ll find three runic stones that must be positioned in specific locations to create a path forward. Unlike randomized puzzles, this arrangement is fixed: placing the stones in the order you discover them, left to right, matching their corresponding slots, opens the passage. If you miss the visual alignment clues, checking adjacent pillars for matching rune patterns guides the solution.
Both puzzles require you to rotate mechanisms or move objects: there’s no magical component or skill check. Pure observation and systematic testing solve them. If you get stuck, backtracking to examine environmental clues typically reveals the answer. The puzzles are designed to be solvable without external guides, though they benefit from careful exploration.
Defeating the Bloodskal Dungeon Enemies
Raven’s Cairn exclusively features draugr encounters, no bandits, undead anomalies, or other creature types. You’ll face standard draugr, draugr warlords, and occasionally draugr deathlords depending on your level. These enemies follow typical draugr behavior: they rely on melee attacks with occasional shout abilities (typically Unrelenting Force or Disarm).
Combat strategy varies by your character build:
Melee-focused characters: Rush tactics work here. Use power attacks to stagger groups, and don’t hesitate to tank damage if you have heavy armor and health restoration. Draugr have no ranged abilities, so closing distance quickly minimizes incoming damage. Bring healing potions, at least 5-10 depending on your armor rating and health pool.
Ranged/magic builds: Stay at distance and use crowd control spells like Mayhem or Calm to thin enemy numbers. Kite through the corridors, using pillars for cover. Destruction magic works well: draugr don’t have significant elemental resistances. Healing spells are essential if you can’t maintain distance.
Stealth characters: Multiple draugr sleep in chambers, sneak attacks eliminate isolated targets before open combat begins. One sneak hit often kills lower-level draugr instantly. Once combat triggers, either retreat to reset aggression or commit to fighting.
Key tactical points:
- Bring healing potions (Healing, Rejuvenation, or brews with Restore Health ingredients)
- Use any shout abilities you’ve unlocked: they often provide substantial advantages
- Don’t get surrounded: pull enemies into corridors where only one or two can attack simultaneously
- Draugr equipment (steel or Nordic weapons) provides minimal challenge and low-value loot: ignore bodies unless you need to restock arrows
By the final chamber, you’ll face the dungeon’s toughest enemy before claiming the blade. Nothing requires specific counters, standard combat tactics handle all encounters. Total dungeon duration is roughly 15-20 minutes for experienced players, or 25-35 minutes if you explore thoroughly and solve puzzles carefully.
Bloodskal Blade Stats and Damage Output
Weapon Damage and Attack Speed
The Bloodskal Blade functions as a greatsword, meaning it inherits the weapon class’s base mechanics: two-handed requirement, relatively slow attack speed, and heavy damage per hit. Here are the precise stats:
- Base Damage: 18
- Attack Speed: 0.75 (slower than most melee weapons, typical for two-handed swords)
- Weight: 15 units
- Value: 2000 gold (extremely high, reflecting its unique status)
- Type: Unique greatsword (cannot be disenchanted, cannot be crafted)
Damage output depends heavily on your two-handed skill and active perks. At skill level 15 with no perks, you’re dealing roughly 18 damage per swing. With maxed two-handed skill and perks like Barbarian (Double Axe and Blunt Weapon damage) and Champion’s Stance (40% increased damage), your effective damage approaches 45-50 per swing before factoring the weapon’s unique enchantment.
The energy wave mechanic adds a substantial damage multiplier. Each slash fires a projectile dealing approximately 25 additional damage, effectively doubling the weapon’s output at range. This means a single power attack can deal upward of 100 total damage (18 base + ~25 enchantment + skill/perk multipliers) against a single target, plus additional damage if the projectile hits another enemy.
Unique Enchantments and Effects
The Bloodskal Blade’s defining feature is its energy wave enchantment, technically an on-hit effect that triggers with every attack. Understanding this mechanic maximizes the weapon’s potential:
Energy Wave Behavior:
- Fires with every hit (normal attacks, power attacks, sprinting attacks all trigger it)
- Creates a visible crimson slash that travels forward in a straight line
- Travels roughly 40-50 feet before dissipating
- Damages all enemies in its path
- Cannot be disenchanted or removed
- Costs no magicka or stamina to activate
The wave projectile scales with your weapon damage, meaning it respects two-handed perks, tempering improvements, and any damage-modifying spells or abilities. This creates a scaling mechanic where investing in two-handed skills directly increases the projectile’s damage, a rare feature for weapon enchantments.
Unlike most enchanted weapons in Skyrim, the Bloodskal Blade’s enchantment requires no soul gems to maintain and never degrades in effectiveness. It’s permanent, always-active, and cannot be accidentally removed through tempering or upgrading. This makes it an exceptionally reliable unique weapon compared to enchanted gear that must be recharged.
The enchantment doesn’t reduce your attack speed or impose penalties. You’re essentially getting a range component on a melee weapon with zero mechanical downside, making it one of the most mechanically efficient unique weapons in Dragonborn.
Best Build Synergies and Combat Applications
Optimal Character Classes for This Weapon
The Bloodskal Blade shines in specific character archetypes that capitalize on its range-melee hybrid nature:
Two-Handed Warrior (Optimal Choice)
This is the Bloodskal Blade’s intended archetype. Heavy armor plus two-handed weapons create a tank-like playstyle where the blade’s energy waves provide crowd control at range. You’re investing heavily in two-handed skill anyway, so the weapon’s projectile damage scales immediately. Recommended stat distribution: Stamina-heavy (250+), moderate health (150+), minimal magicka.
Battlemage Hybrid
Combine the Bloodskal Blade with destruction magic or alteration spells. Cast Paralysis on groups, then finish with blade strikes that hit both melee and projectile targets. Grindstone restoration spells while wearing heavy armor, or invest in Conjuration for summons that tank while you attack from mid-range. This works exceptionally well because the blade’s projectiles don’t conflict with spell rotations, you’re free to cast between attacks.
Spellblade with Alteration
Use Ebonyflesh or Ironflesh to amplify defenses while wielding the blade at short range. The energy waves eliminate enemies before they close distance, letting you finish stragglers with standard swings. Invest in Restoration for self-healing and Alteration for damage mitigation. This balances magic investment with melee effectiveness.
Elemental Enchanter
Apply elemental enchantments to the Bloodskal Blade? You can’t enchant it further (unique weapons can’t be re-enchanted), but you can use circlets, rings, and other gear with elemental damage auras. Pair it with items that add shock, frost, or fire damage to supplement the blade’s base stats. This requires careful gear selection but creates flexible damage types.
The Bloodskal Blade struggles in pure stealth or archery builds because it requires direct engagement to trigger, and its value proposition diminishes when you’re avoiding combat entirely. It’s a weapon for players who want to be seen, feared, and at the center of action.
Perk Trees and Skill Combinations
Maximizing the Bloodskal Blade’s potential demands specific perk investments:
Two-Handed Weapon Tree (Priority Skills):
- Barbarian (rank 1-2): +50-100% damage with axes and blunt weapons. For greatswords specifically, this doesn’t apply directly, but alternatives do.
- Champion’s Stance: +40% damage with two-handed weapons. This applies to the blade and scales its projectiles.
- Sweep: Power attacks hit all enemies in front of you. Combined with energy waves, this clears groups efficiently.
- Warmaster’s Stance: 25% chance to cause staggers on hit. Useful for locking down tougher enemies while projectiles finish weaker ones.
Complementary Skills:
Heavy Armor (supporting tree):
- Juggernaut: Increases armor rating. At 5 ranks, you gain 50% increased armor value, letting you tank hits while attacking.
- Reflect Damage: 10-25% of damage taken damages the attacker. This passive mitigation is invaluable when facing multiple enemies.
Restoration/Enchanting:
- Respite: Healing spells restore stamina. Essential for two-handed users who rely on stamina for power attacks.
- Enchanter perks don’t apply to the Bloodskal Blade itself, but investing in circlets with relevant enchantments multiplies your effectiveness (magic resistance, stamina regeneration, etc.).
Stamina Regeneration is Critical
The Bloodskal Blade’s power attack cost is substantial. Invest perks or gear that boost stamina regen: the Restoration tree’s Respite perk, enchanted helmet pieces with Fortify Stamina Regen, or potions. Without stamina regeneration, you’ll be limited to weak normal attacks between power attacks.
A complete optimized build invests roughly 25-35 perk points into two-handed weapons and heavy armor, leaving 10-15 for Restoration or utility skills. This creates a character that fully leverages the blade’s damage output while maintaining survivability.
Comparing the Bloodskal Blade to Other Legendary Weapons
The Bloodskal Blade occupies a unique niche among Skyrim’s legendary weapons. Comparing it to alternatives helps determine whether it’s truly optimal for your playstyle.
vs. Daedric Greatsword
The Daedric Greatsword deals slightly more base damage (20 vs. 18) and can be crafted or found through leveled loot. But, it lacks any unique enchantment, you’re purely getting raw damage. The Bloodskal Blade’s energy waves effectively double its output against multiple enemies, making it superior in group combat. For single-target duels, the Daedric Greatsword is marginally better if you’re willing to sacrifice the projectile mechanic.
vs. Wuuthrad (Ysgramor’s Axe)
Found by completing the Companions questline, Wuuthrad is a unique battle axe with no enchantment bonus. It deals 17 base damage but benefits from axes’ higher attack speed (0.9 vs. 0.75). Wuuthrad is purely a raw damage weapon: the Bloodskal Blade’s range advantage and unique mechanic make it more versatile. Wuuthrad suits pure damage-per-second builds: the Bloodskal Blade suits tactical, crowd-control oriented playstyles.
vs. Harrim’s Sword
Found in Bloodlet Throne, Harrim’s Sword is a unique longsword dealing 15 base damage with an absorb health enchantment. It’s weaker than the Bloodskal Blade numerically and lacks crowd control utility. Harrim’s Sword is viable for vampire builds where life-steal mechanics stack multiplicatively: otherwise, the Bloodskal Blade outperforms it significantly.
vs. Ebony Blade
Found through Mephala’s questline, the Ebony Blade is a unique greatsword dealing 22 base damage with absorb health enchantment and scaling bonuses (increases damage based on victim health lost). The Ebony Blade technically deals more raw damage and has superior sustain mechanics. But, it requires killing humanoids to level the weapon, making it farm-intensive early on. The Bloodskal Blade’s immediate effectiveness without farming makes it superior for natural playthroughs, though the Ebony Blade eventually surpasses it at endgame with full scaling bonuses.
Verdict
The Bloodskal Blade excels in mid-game content (levels 15-35) and remains viable through endgame. Its unique projectile mechanic is genuinely useful, distinguishing it from pure damage weapons. But, specialized weapons like the Ebony Blade or Wuuthrad offer specific advantages in niche scenarios. Most players who value versatility and the satisfaction of a unique questline will prefer the Bloodskal Blade, but pure optimizers might benchmark other options. You can explore different builds and comparisons across various gaming sites, resources like Game8’s tier lists provide detailed weapon rankings if you’re comparing multiple legendary options.
Tips for Maximizing the Bloodskal Blade’s Potential
Enchantment and Tempering Strategies
Unlike most weapons, the Bloodskal Blade cannot be re-enchanted due to its unique status. This means your enchantment strategy focuses entirely on tempering and supplementary gear:
Tempering the Blade
Temper the Bloodskal Blade at any grindstone using iron ingots (one ingot per tempering). With the Whetstone perk in heavy armor, tempering grants a 25% damage bonus. Without the perk, you receive the standard improvement. Theoretically, you can use weapon tempering repeatedly, each application stacking multiplicatively:
- Untempered: 18 damage
- Tempered (1x): ~22.5 damage
- Tempered (5x): ~70+ damage
But, tempering has diminishing returns, each successive tempering requires iron ingots, and the multiplier applies logarithmically. In practical terms, tempering 5-10 times is reasonable: beyond that, you’re investing resources for marginal gains. The optimal approach is tempering 2-3 times early, then again before major encounters if you’ve acquired additional iron.
Supplementary Enchantments on Other Gear
Focus your enchantment crafting on complementary items:
- Helmet: Fortify Two-Handed Weapons, Fortify Stamina Regen (critical for power attacks)
- Gloves: Fortify Two-Handed Weapons, Fortify Stamina
- Legs: Fortify Health, Fortify Heavy Armor
- Boots: Fortify Stamina Regen, Resist Damage
- Rings: Fortify Health, Fortify Stamina (absolute priorities)
- Circlet: Fortify Stamina Regen, Resist Damage, or relevant resistances
The goal is stacking fortified damage multipliers outside the blade itself. A Bloodskal Blade wielder with enchanted heavy armor covering every slot can achieve 50-80% increased total damage compared to base stats.
Soul Gem Farming for Supplementary Items
If you’re crafting new enchanted gear to complement the blade, stock up on petty and lesser soul gems. Daedra hearts, lesser void salts, and leathers are abundant enough that gear enchantment is feasible even without extensive soul farming. Prioritize enchanting items you’ll actually equip: don’t waste gems on armor pieces you won’t wear.
Combat Techniques and Tactics
Effective Bloodskal Blade wielding goes beyond raw stats, it requires understanding positioning and attack timing.
Power Attack vs. Normal Attacks
Power attacks drain stamina but deal 2.5x damage and trigger staggers on hit. Against single enemies, spam power attacks until stamina depletes, then switch to normal attacks while stamina regenerates. Against groups, alternate between normal attacks (which maintain crowd control through projectiles) and power attacks (which eliminate priority targets). This rhythm keeps you mobile while dealing consistent damage.
Positioning Against Groups
When facing 3+ enemies, maintain distance where the energy waves can hit all targets. Back into corridors or corners to prevent surrounding. Attack enemies at the wave’s path, if three enemies are lined up, a single strike damages all three. Avoid clustered, open combat where enemies surround you: even with heavy armor, simultaneous hits from multiple draugr can overwhelm you quickly.
Stamina Management
Stamina is your limiting resource. Prioritize stamina regeneration through gear and perks. During extended fights:
- Perform 2-3 power attacks, targeting high-threat enemies
- Switch to normal attacks while stamina regenerates
- Kite backward to maintain distance while normal attacks’ projectiles damage pursuing enemies
- Resume power attacks once stamina is available
This cycle keeps you dealing damage while managing sustainability.
Combining with Shouts
Unrelenting Force, Drain Vitality, Stun, and Elemental Explosion shouts pair exceptionally well with the Bloodskal Blade. Use shouts to stagger groups, then follow with power attacks on isolated targets. Unrelenting Force is particularly useful for knocking enemies off cliffs or into traps, the blade provides follow-up damage if they survive the initial hit.
Defensive Synergies
Don’t treat the Bloodskal Blade as purely offensive. If you’re taking significant damage, back away and let projectiles damage enemies from distance. Use heavy armor’s innate blocking mechanics and shield-bashing if equipped with a shield (though optimal Bloodskal builds use two-handed, so shields aren’t applicable). Healing spells between encounters keep you topped off without relying on potions.
These tactics transform the blade from a pure damage tool into a versatile, survivable weapon that handles diverse combat scenarios. Whether facing single bosses or draugr hordes, adapting your approach between power attacks, positioning, and crowd control maximizes the blade’s inherent strengths. For detailed tactical breakdowns and meta analyses, consulting resources like RPG Site’s character build guides can provide additional perspectives on optimizing two-handed weapon strategies across different Skyrim playstyles. Also, if you’re interested in modifying the game or exploring alternative weapon mechanics, Nexus Mods offers extensive options for tweaking weapon balance and creating custom variations of legendary arms.
Conclusion
The Bloodskal Blade represents more than just another legendary weapon, it’s a reward for exploring Solstheim’s depths and a statement about your willingness to engage with Dragonborn’s unique content. Its energy wave mechanic fundamentally changes how two-handed combat plays out, offering genuine tactical advantages that pure damage weapons lack. From the moment you acquire it at Raven’s Cairn through to endgame encounters, the blade scales with your investments in two-handed skills and heavy armor, rewarding character development rather than rendering itself obsolete.
The path to mastery involves understanding its mechanics: when to trigger power attacks for maximum burst damage, how to position groups for optimal projectile coverage, and which builds amplify its strengths. Compared to other legendary weapons, the Bloodskal Blade excels in versatility and crowd control rather than pure single-target damage, making it the choice for players who value tactical options over raw numbers.
Whether you’re a completionist collecting every unique weapon or a player seeking a genuinely interesting playstyle, the Bloodskal Blade deserves a place in your arsenal. Its combination of prestige, mechanical uniqueness, and practical effectiveness makes it stand out among Skyrim’s legendary arms, and more importantly, it’s genuinely fun to use.